Some of the best crafts feature materials you can easily find in or around your home. Pebble art is one that many kids love to do because it’s fun searching for pebbles and getting imaginative with the pictures we create. Plus, the finished pieces look perfect hanging on the walls of your home.
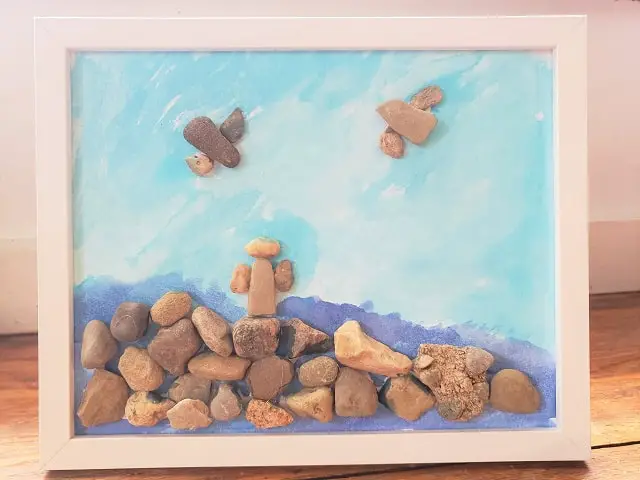
This tutorial walks you through the process of creating any type of pebble art picture you want. For the purpose of showing you how to do it, our crafting experts made a simple rocky ocean scene, but feel free to change up your picture to make anything you want!
How to Create Your Own Pebble Rock Art
Tutorial overview
- Total Time: 1 hr
- Skill Level: Beginner
- Estimated Cost: $25
Follow along with the steps below to create your very own pebble art. Don’t forget: This project is versatile. You can use the steps below for any design you want to make, and you can finish off your picture however you’d like. Make a forest of woodland animals, a portrait of your family, or a silhouette of a person looking at the night sky. This is the perfect craft to get creative with!
All Photos Credit: Amy Boyington
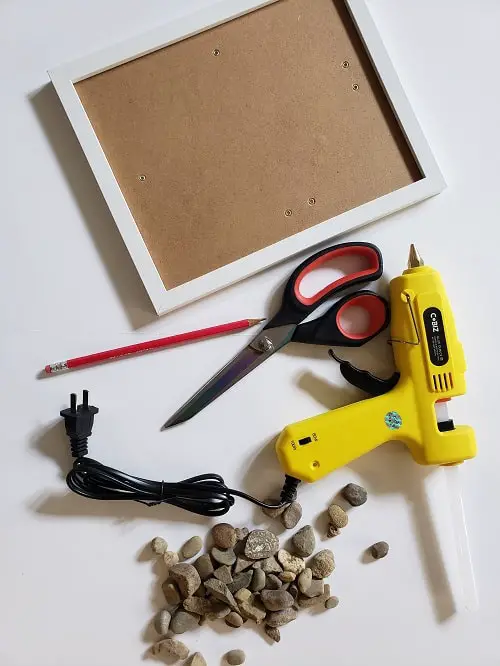
What You’ll Need
Equipment / Tools:
- Craft scissors
- Hot glue gun
- Pencil with eraser
Materials:
- 8×10 picture frame with glass removed
- 1 sheet of heavy cardstock
- Assortment of pebbles
- Optional: Materials to complete your design, like watercolor paint, twigs, or craft wire
Tips for Choosing the Right Materials for Pebble Art
Before we get started, here are a few tips that could help you complete this pebble art project:
- Choose pebbles in a variety of shapes, sizes, and colors. If you can’t or don’t want to search outside, you can order packs of assorted pebbles on Etsy, Amazon, and other online stores, or find them in your local craft store.
- Any craft scissors will do, but our crafting experts recommend long-bladed scissors that cut easily through heavy cardstock without snagging or bending it. Check out our guide to the best craft scissors for some ideas.
- Choose a hot glue gun with high heat capabilities, like a dual temperature hot glue gun. The high heat will ensure a strong adhesion between the cardstock and pebbles.
- When looking for cardstock, you’ll see that it comes in different weights. For this project, you’ll need a heavier cardstock that can support the weight of the pebbles. The example here uses a 110 lb cardstock weight, but anywhere from 90 lb to 130 lb can work.
Craft Instructions
Ready to make your pebble art project? Follow the steps below.
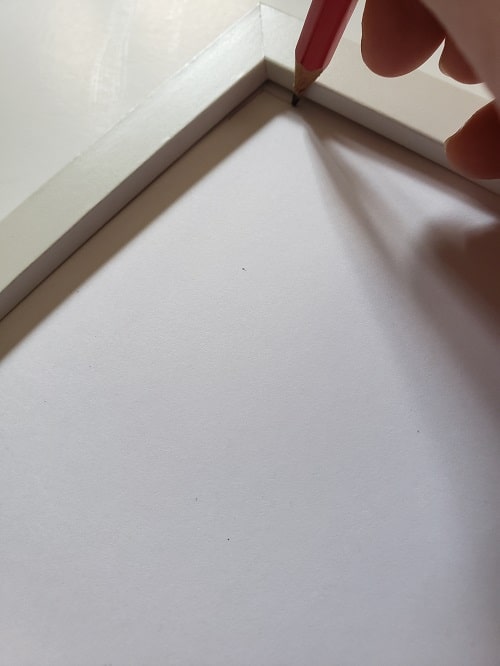
1. Fit the cardstock to the frame
Most cardstock comes in the regular paper size of 8.5 inches by 11 inches, so you’ll need to trim yours down to fit your 8×10 frame. To do this, center the cardboard back of your picture frame over the cardstock and lightly trace around the back. Then, use craft scissors to cut off the excess cardstock.
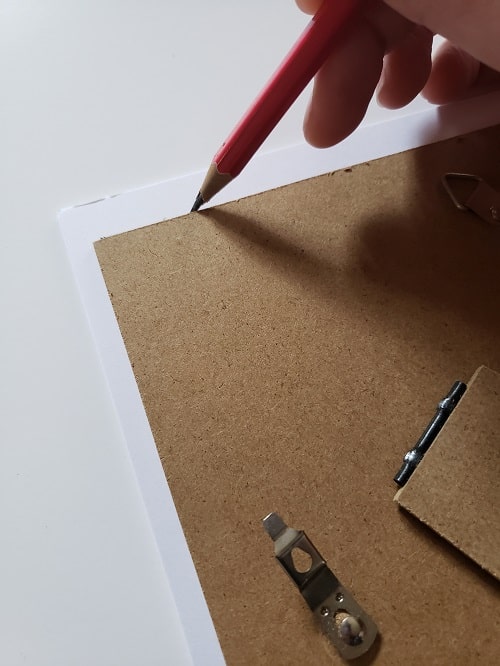
Next, you’ll need to mark off where the front of your frame sits on the cardstock. This helps you keep your pebbles and picture within the frame’s dimensions. With your pencil, lightly trace around the inner frame’s corners to give you that guideline.
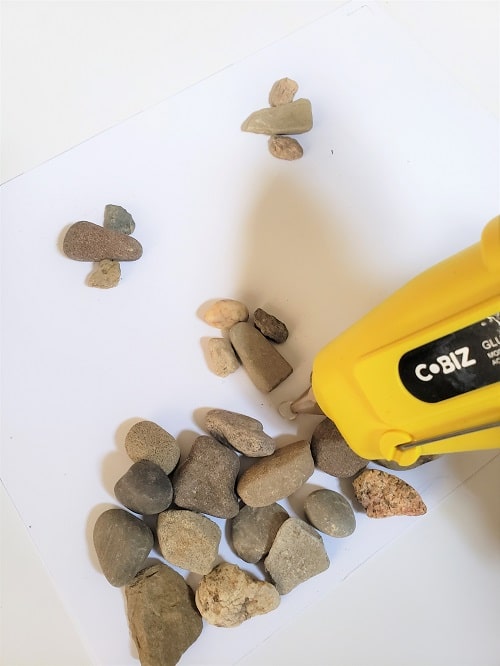
2. Plan your design
Now, it’s time to plan your design on your cardstock. It’s much easier to do this before you start gluing, just to make sure you fit the pebbles together to create the picture you want.
You can play around with pebble sizes and shapes for a while to get a good fit. You may wish to use pebbles with varying shades of color. But feel free to do whatever you’d like here! Just be sure to keep your pebbles within your frame guidelines you traced in the last step.

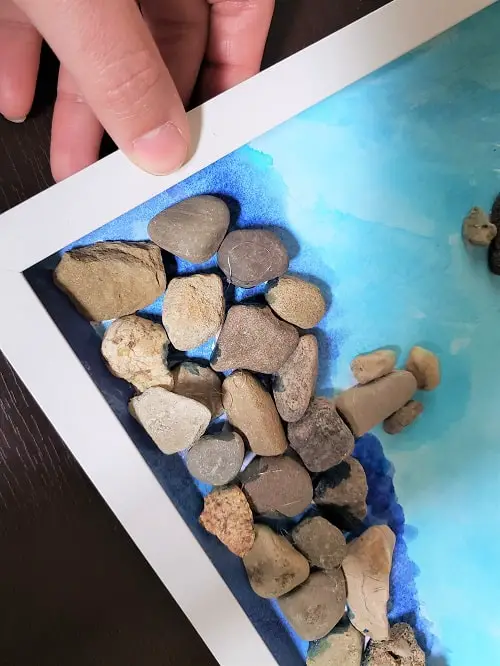
3. Glue the pebbles
Heat your glue gun until it’s ready to glue, which usually takes a minute or two. If you have a dual-temperature hot glue gun, use the higher temperature setting.
One by one, pick up a pebble and place a dot of glue on the paper where it will sit. Put the pebble back in place, gently pushing it on the paper to create a strong adhesion.
Continue until you’ve glued all the pebbles. Allow everything to set for five to ten minutes before moving on.
4. Complete the picture
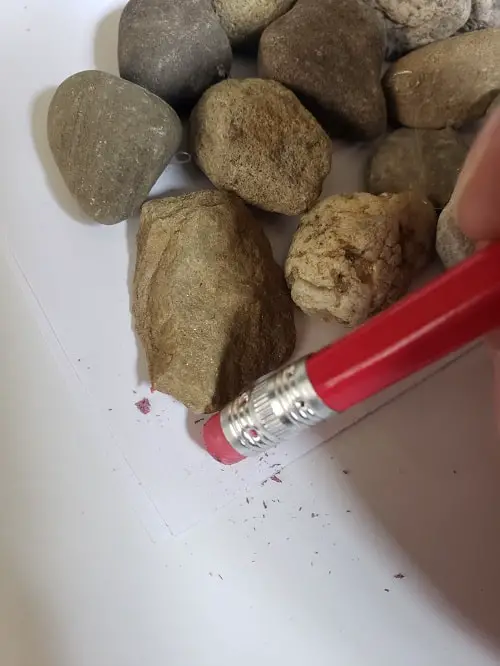
You can choose to leave your pebble art as is. Pebble art looks beautiful without adding anything to your picture. Before framing, use your pencil eraser to erase the frame guidelines you traced on the cardstock.
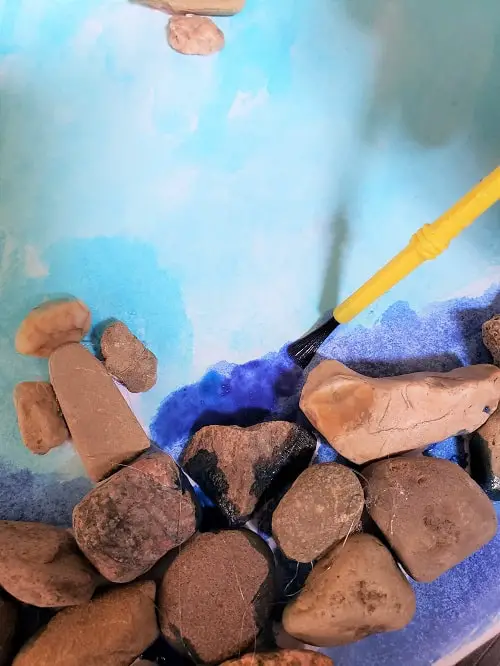
You may wish to add some details with a pencil for more minimalistic pictures or with watercolor paint for fun pops of color. You can also use twigs, leaves, craft wire, beads, or whatever else you want, to embellish your pebble art. For instance, if you want to have a tree with birds sitting on its branches, you can make the tree and birds with pebbles but use real branches or craft wire to make the branches.
For example, you can chose to use watercolors to paint the sky and ocean. You can do this before you add your pebbles, too, if you prefer.
5. Frame it
Now, all you need to do is frame your piece! To give the picture extra support, you can slide the back of the frame underneath the picture. Then, place the frame on top and lock it into place. This keeps the picture sturdy as you place it in the frame.
Pebble Art Tips
There are so many ways to do pebble art. You can form pebbles into all sorts of shapes, pictures, and even words and phrases. Here are a few tips that might help you as you design your pebble art:
- Clean off your pebbles first if they’re ones you’ve gathered from outside. Once dirt and grime gets on your cardstock, it can be almost impossible to get it off.
- Clean up any strings left from your hot glue after you’ve glued down all your pebbles, unless you like the look of them there — that’s fine too!
- If you’re using a lightweight cardstock that you don’t think will support your pebbles, use your hot glue gun to glue a few pieces together in the corners.
- Try not to overwhelm the picture with pebbles. The idea is to make sort of a minimalistic picture with the pebbles so that they stand out on the page.
Hopefully, this tutorial has inspired you to create your own simple pebble art with your kiddos. Keep following Creative Family Moments for crafting tutorials, crafting reviews, family activities, and more.