Looking for a gorgeous decoration for your front porch or backyard? There’s nothing quite like sitting outside and enjoying a nice breeze with the background music of a wind chime.
Wind chimes can get expensive when you buy ready-made ones. Making your own is much more affordable, and you can customize it to your tastes. Follow along with this tutorial to learn how to make a beautiful wind chime for your yard.

All Photos Credit: Amy Boyington
How to Create Your Own DIY Wind Chime
Tutorial overview
- Total Time: 3 hrs
- Skill Level: Intermediate
- Estimated Cost: $30
Wind chimes are spring and summer staples to have outside your home, giving you relaxing noise with every breeze. This coastal-inspired DIY wind chime uses sea glass and wooden beads for calm, gentle music. Try this project now to ring in the summer!
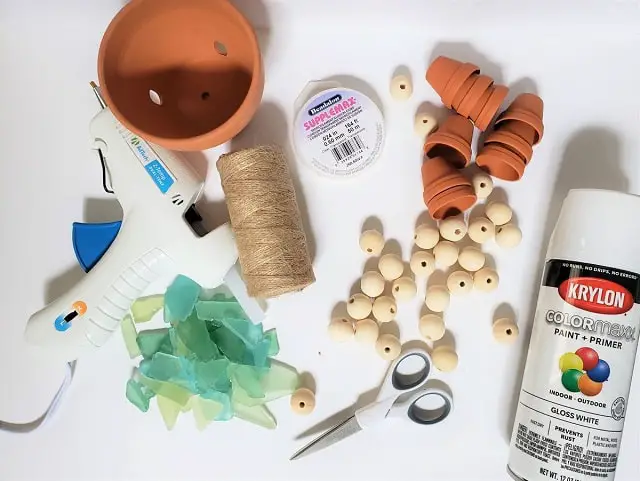
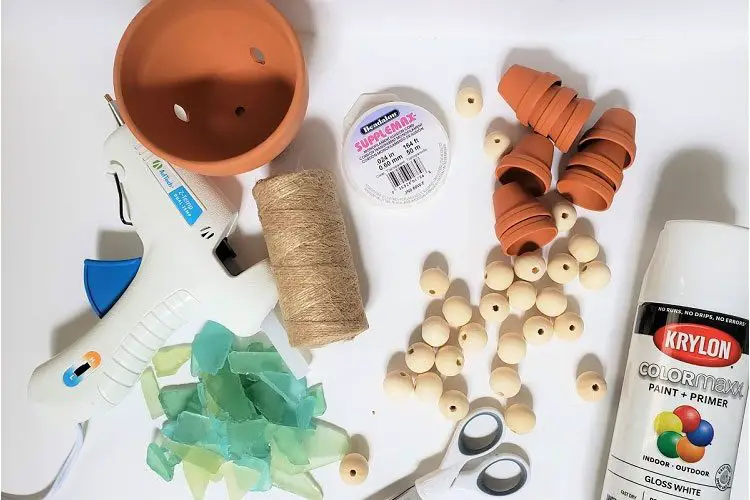
What You’ll Need
Equipment / Tools:
- High-temperature hot glue gun
- Craft scissors
Materials:
- 1 6-inch terra cotta pot
- 9 1 ½-inch terra cotta pots
- White spray paint (optional)
- 11 wooden beads
- Mixed sea glass pieces
- Thin jute twine
- Illusion cord
Tips for Choosing the Right Materials for a DIY Wind Chime
Choosing the right materials for your DIY wind chime can make the difference between a project success and a DIY flop. Here are a few tips that’ll help you make yours:
- Make sure your large terra cotta pots have a hole at the top and holes around the sides to attach your twine to. Each small terra cotta pot should have a hole in the top as well.
- If you choose to spray paint your terra cotta pots, choose spray paint that’s made for outdoor use. It should be marked right on the can. Outdoor spray paint holds up to the heat of the sun and wet weather, so your wind chime can look great all year long.
- Feel free to use different size pots than what our craft expert used, but make sure you adjust the size of your wooden beads and jute twine to accommodate. Larger pots that hang down should have larger beads to make noise in the wind, and you may need thicker twine to fit through their holes. For this project, our craft expert used 20 mm wooden beads and 1 mm twine.
- Look for decent-sized shards of sea glass rather than tiny scraps. They’ll work much better as noisemakers and will be eye-catching on your wind chime.
- Use illusion cord that’s at least 0.30 mm thick to ensure that it can carry the weight of the sea glass.
DIY Wind Chime Instructions
Gather your materials, and get started! Our craft expert suggest doing your painting at least one day before you start the rest of the project. This gives them plenty of time to dry and see if you need to add another coat before continuing.
1. Paint the pots
Place your pots in a box or on top of cardboard or newspaper to protect your work area. Using a sweeping motion about a foot or so away from the pots, spray them with the spray paint, turning them as needed to paint all the way around.
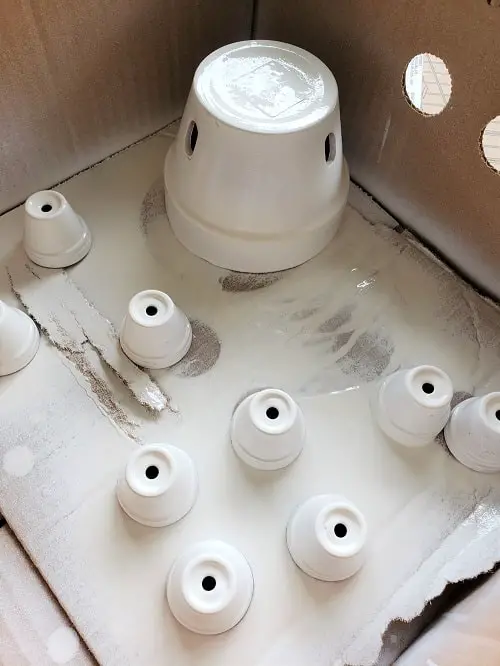
Allow the pots to dry for several hours. If you need another coat, apply it the same way.
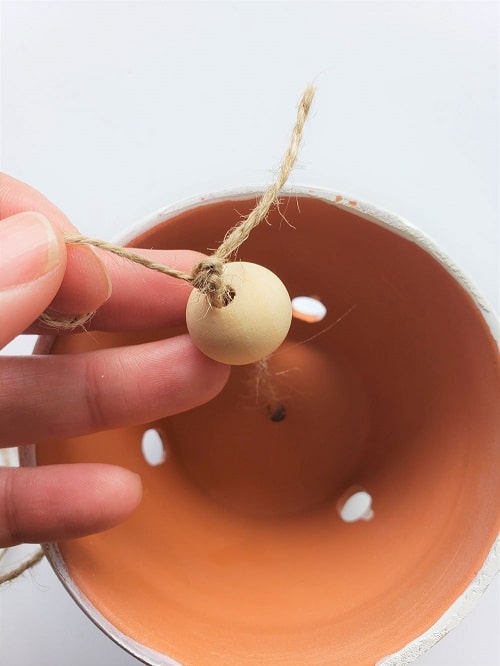
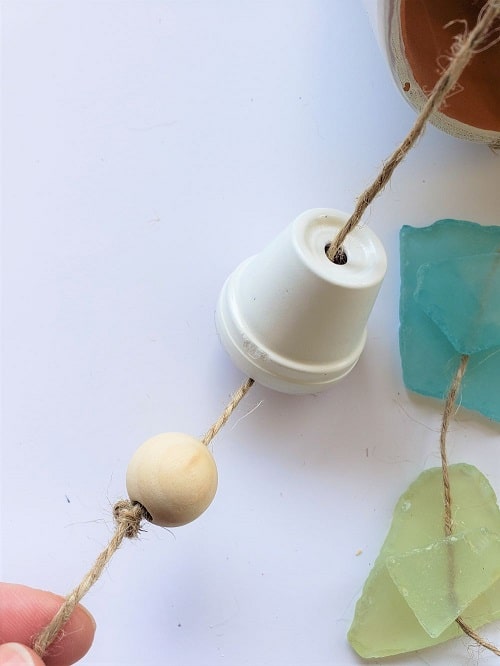
2. Prepare the twine
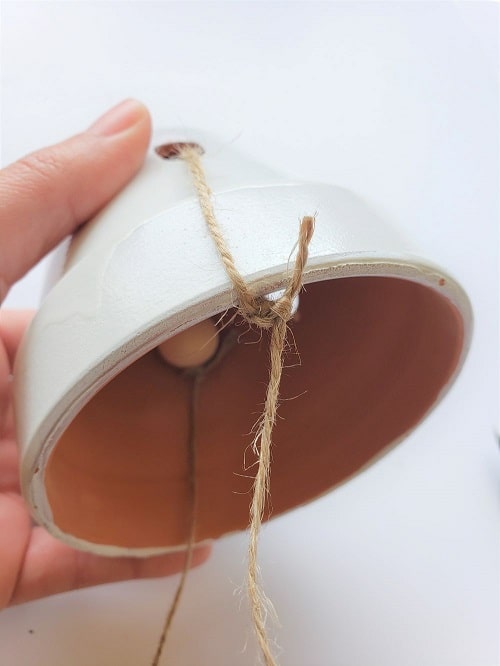
Take one end of the twine and fold it over to make a loop. Stick the looped end through one wooden bead.
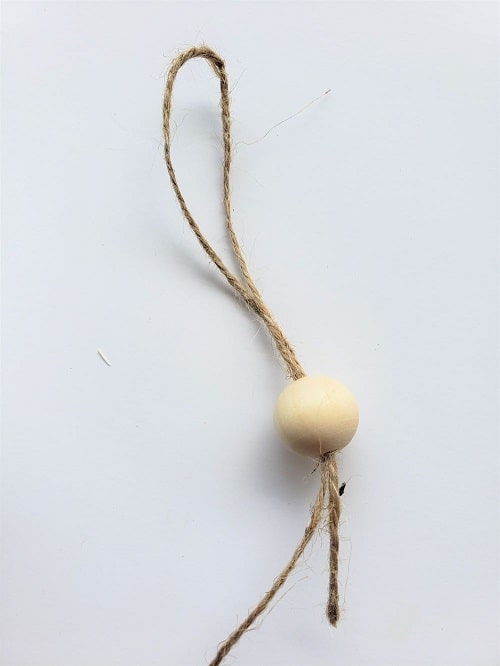
Then, make a few knots underneath the bead, large enough to hold it in place. Slip the looped end up through the top hole in the pot. This becomes the hanger for the wind chime.
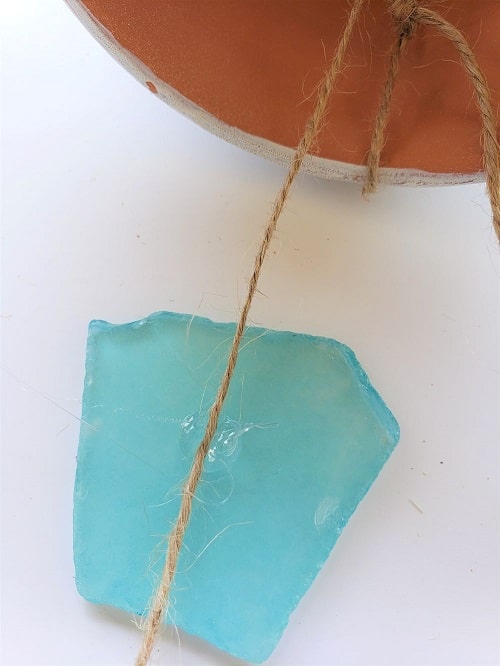
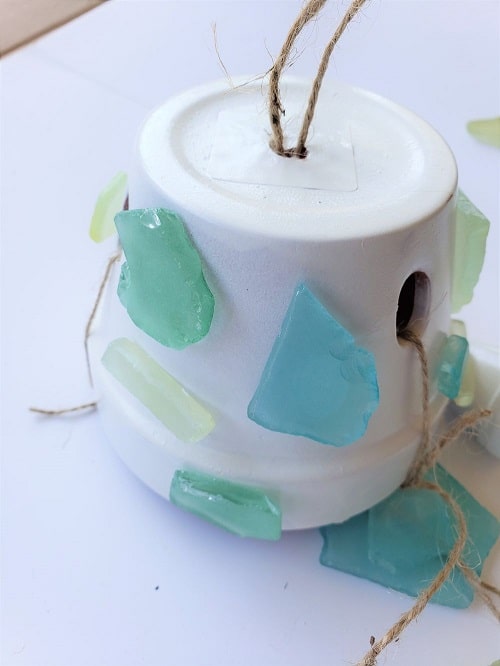
3. Glue the sea glass
You’ll now have a long piece of twine hanging down in the middle of the pot. Use your craft scissors to cut it about 14 inches down.
Glue a piece of sea glass to the string by placing a dollop of hot glue on the glass and setting the string in the glue.
Add another drop of hot glue over the string, followed by another piece of sea glass to hold it all in place.
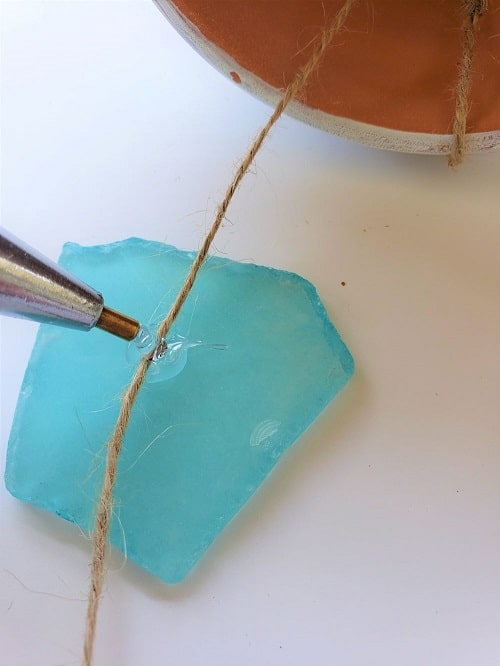
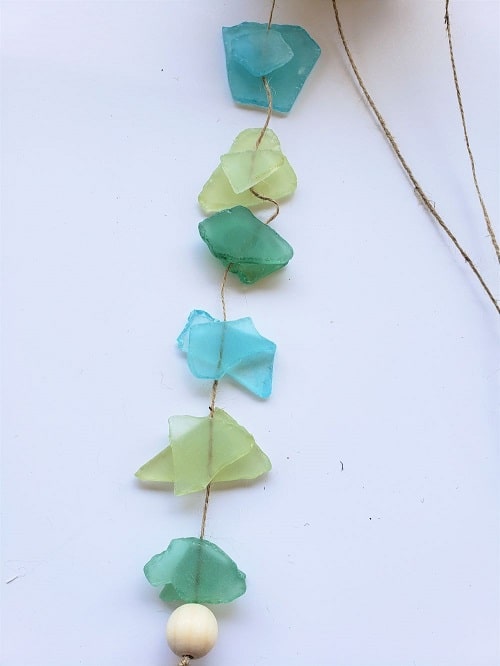
Repeat a few more times to make a chain of sea glass going down the length of the string, spaced about an inch apart. Our craft expert repeated each of the three colors twice.

Add a bead to the end of the twine and knot the twine several times underneath the bead to hold it in place. Trim the excess twine, if necessary.
4. Attach the small pots
Cut an 18-inch piece of twine. Put one end through one of the large pot’s side holes and knot it.
Then, slide a small pot up the twine, leaving at least a couple of inches between it and the large pot, followed by a wooden bead. Tie several knots under the wooden bead to hold it in place.
Now, do the same with two more pots and beads, giving you three small pots and beads on that piece of twine. Trim the excess twine with your craft scissors.
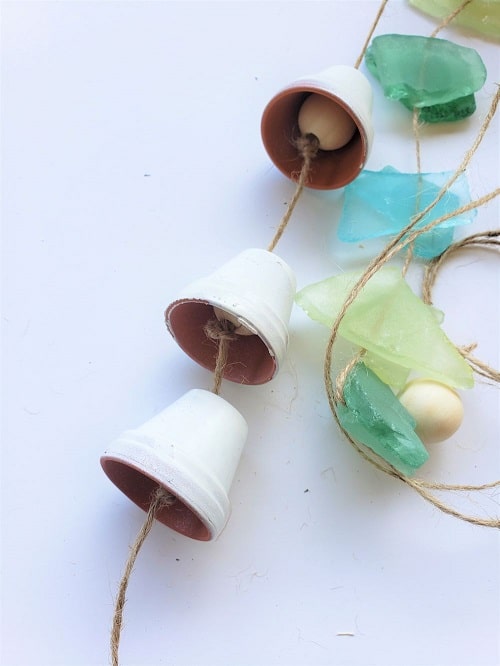
You can then repeat this process for the other two holes in the larger pot. Tie the twine and add pots and beads, giving you a total of nine small pots and beads.
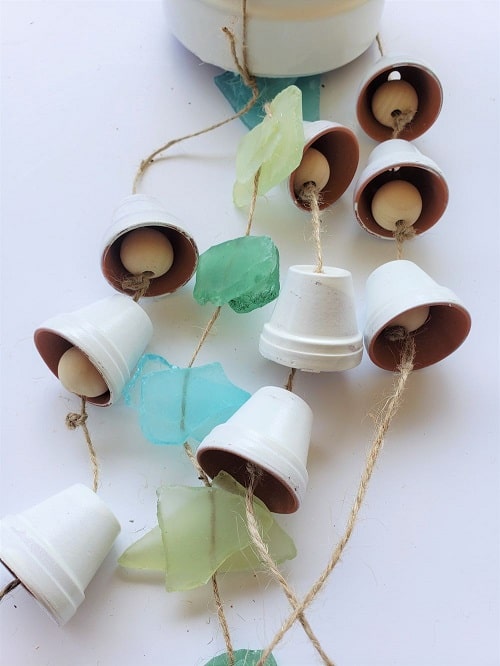
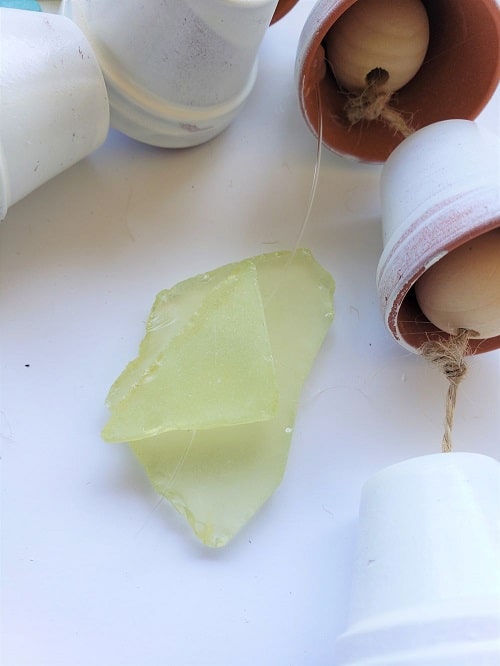
5. Add more sea glass
To give the wind chime even more opportunities for gentle sounds, you’ll add more sea glass near the small pots. Cut a six-inch length of illusion cord. Place a dollop of hot glue on the inside of one of the top small pots and stick the end of the illusion cord in the glue.

Then, glue two pieces of sea glass about an inch down the illusion cord, just like you did in step 3.
Trim the excess illusion cord from the bottom. Repeat this process with the other two top small pots, giving you three strands of sea glass attached to the small pots.
6. Decorate the pot
Use your leftover sea glass to add some pieces to the larger terra cotta pot. This is a fun step for the kids to do. You can add some dots of hot glue and have them stick on the pieces they like.
In the end, your wind chime should look similar to this:

DIY Wind Chime Tips
To keep your wind chime looking great for years to come, here are a few tips to consider:
- Spray your wind chime with a clear UV-resistant spray paint if your wind chime is going to be in intense sunlight for most of the day. As a bonus, it’ll give it an extra layer of protection against the weather.
- Don’t feel like you need to space your small pots evenly. Our craft expert made their strands of small pots all a bit different, which gives the sea glass a better chance to hit the pots, no matter which way the wind is moving.
- Be careful about where you hang your wind chime. Try to find a spot where it can be somewhat blocked from heavy winds.
- Use a reliable mounting system to hang your wind chime. A hook is best for securing it in place., like these screw-in hooks.
Have fun creating your new wind chime! You might even get the kids in on the fun by giving them the pots to paint and letting them get creative.