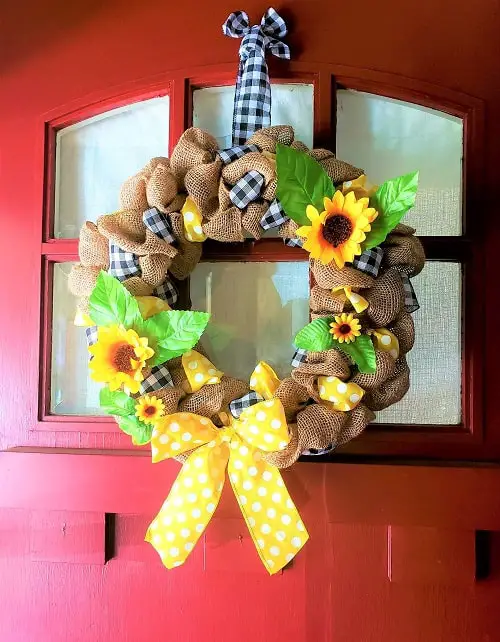
Want to make a simple but stunning DIY ribbon wreath? While they look complicated to make, they are actual quite easy to piece together.
The best thing about ribbon wreaths is that they’re completely customizable. You can make a plain burlap ribbon wreath, which looks gorgeous and rustic on its own. Or, adorn it with accent ribbons, bows, and whatever else you choose. In other words, it’s a perfect fit for all seasons and celebrations.
All Photos Credit: Amy Boyington
How to Create a DIY Ribbon Wreath
Tutorial overview
- Total Time: 2 hrs
- Skill Level: Beginner
- Estimated Cost: $30
To make a basic ribbon wreath, you’ll need several yards of a ribbon of your choice. Different ribbons have different qualities. For example, burlap ribbon holds its shape well and creates a farmhouse-like finish. But, really, you can make this using whatever kind of ribbon you’d like.
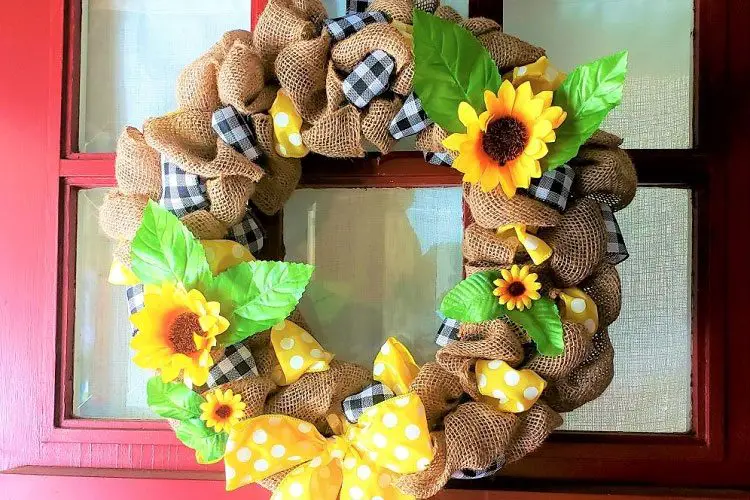
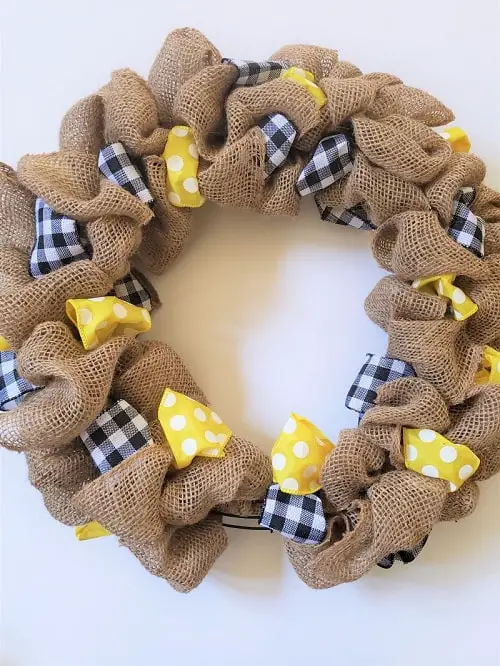
Below, our crafting experts have listed the materials you’ll need to make the sunflower wreath pictured below. But if you’d like help with choosing the materials for making a different wreath, head down to the material tips section.
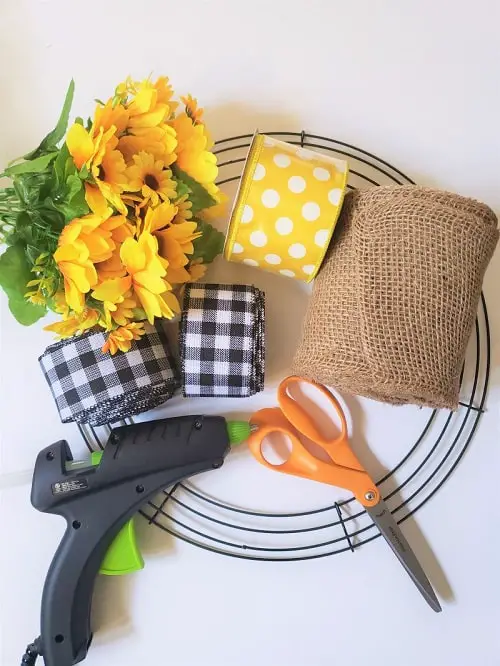
What You’ll Need
Equipment / Tools:
- Craft scissors
- Hot glue gun
Materials:
- 14-inch wire wreath form
- At least 12 yards of 5-inch wide burlap ribbon
- At least 5 yards of 2.5-inch yellow polka dot ribbon
- At least 5 yards of 2-inch black checkered ribbon
- Artificial sunflowers
Tips for Choosing the Right Materials for a Ribbon Wreath
The following tips can help you find the right materials for making a ribbon wreath using the same technique as our craft experts did in this tutorial:
- Burlap ribbon is a great choice as it holds its shape well because it’s a little stiffer than others.. But if you want to use different ribbon, go for it! Our craft experts suggest finding ribbon that’s somewhat stiff, as it’ll be easier to shape it as you go along.
- The width of your ribbon will play a role in how much you need. If you’re using ribbon that’s four inches wide or more, you’ll need a little less than you would for narrower ribbons. If you’re using just one type of ribbon, get at least 30 yards to be on the safe side — you can always use the leftover for another wreath or craft!
- You’ll need to use a hot glue gun for this wreath to glue the artificial flowers onto it. If you don’t plan to adorn your wreath with anything, you won’t need this. But if you do, use a low-temperature or a dual-temperature hot glue gun on the low-temp setting, which won’t harm the ribbon.
- Choose craft scissors designed to use with fabric. They’re the best for cutting ribbon easily without fraying it.
- Feel free to use other wreath form sizes. The 14-inch size is a safe choice as it fits perfectly on many front doors. But they also come in 10-inch, 12-inch, 18-inch, etc. Just be sure to make adjustments for the amount of ribbon you’ll need for smaller or larger wreaths.
DIY Ribbon Wreath Instructions
Ready to make your ribbon wreath? Great! Follow along with these step-by-step instructions.
1. Attach the burlap ribbon
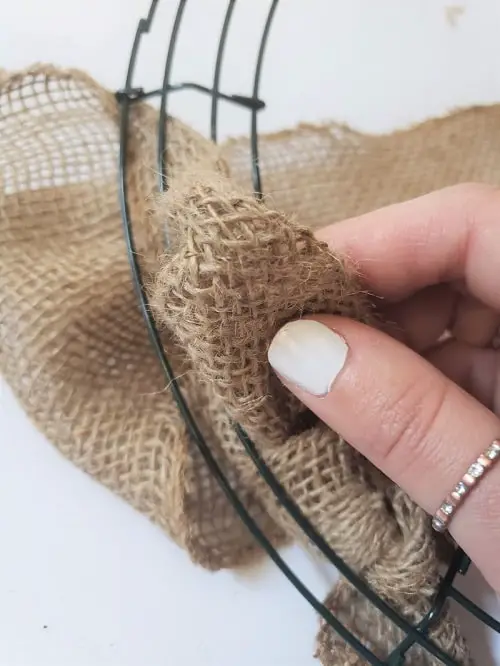
Start with the burlap ribbon, as this will be the ribbon you use in the bulk of the wreath. Take the end of the ribbon and push it through the innermost section of the wreath form. Then, bring it over the wire and down through the next section.
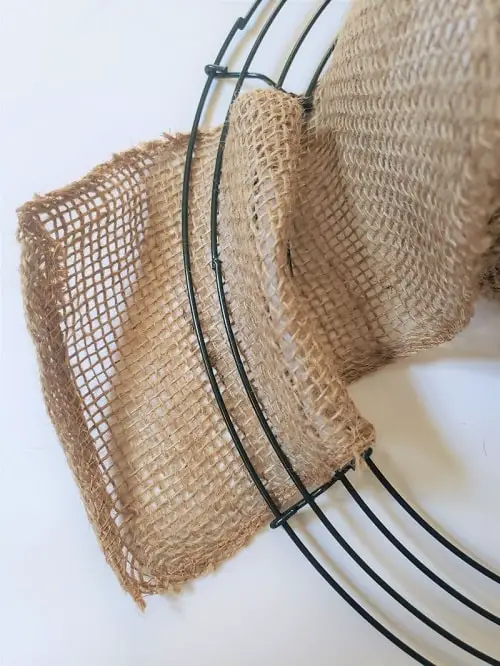
Now, flip the wreath form over and tie the ribbon in a knot around the wreath form wire. This is the backside of the wreath, so don’t worry if it looks a little sloppy — you won’t see any of that from the front!
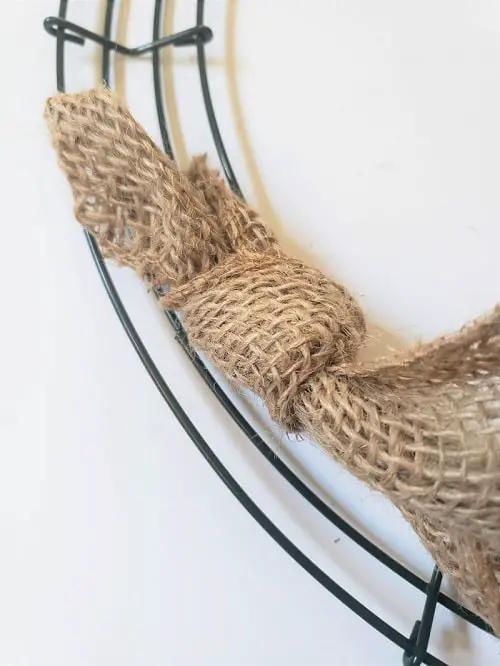
2. Start formatting loops
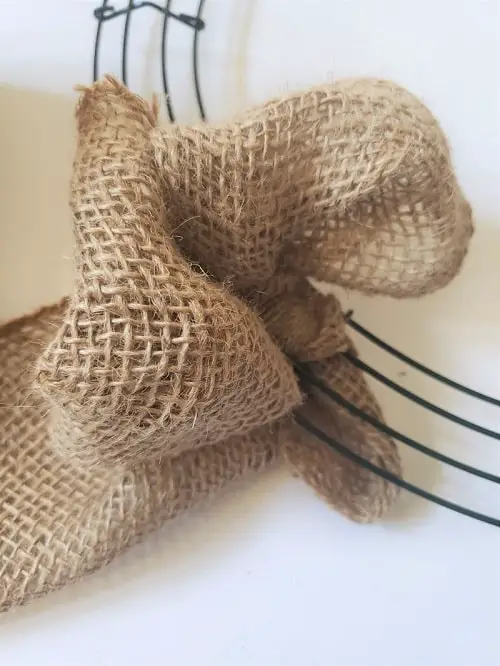
Now, flip the wreath form back over to the front. Take a section of ribbon, bunch it up, and pull it through a section of the wreath form to create a loop.
Underneath the wreath form, grab the ribbon, twist it once, and bunch it up again, this time sticking it up through a different section of the wreath form. You’ve now made your first two loops.
You can continue doing some more burlap loops if you want really sparse accents throughout. In that case, move onto step 3 only when you’d like to add your first accent ribbon. If you’d like to jump right into the accents, move to step 3 now.
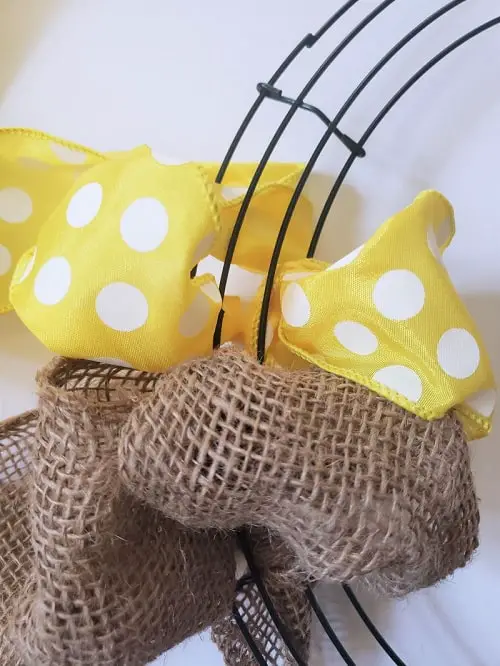
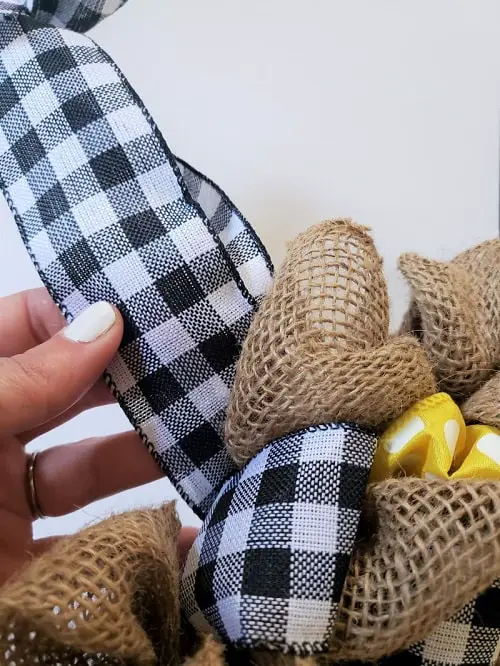
3. Attach an accent ribbon
Attach your first accent ribbon in the same way that you did the burlap ribbon. Pull an end up and over the wire and into the middle section of the wreath form.
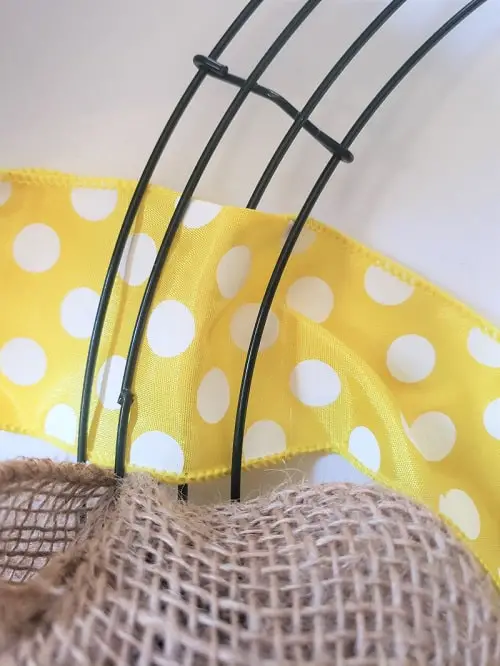
Tie a knot in the end of the ribbon, attaching it to the wire on the wreath form. Your first accent ribbon is ready to go!
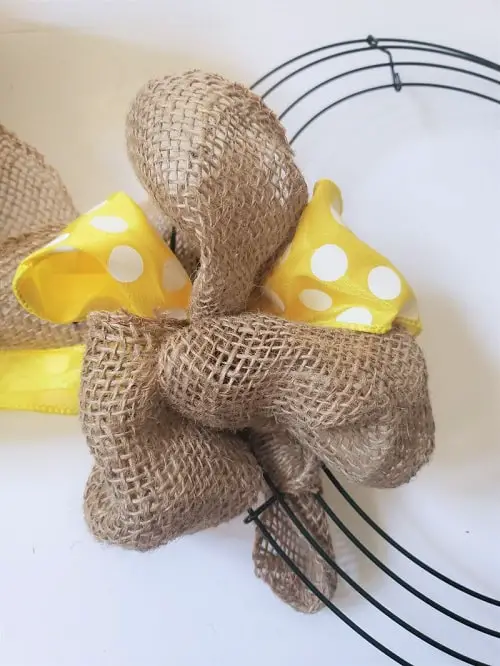
4. Form accent loops
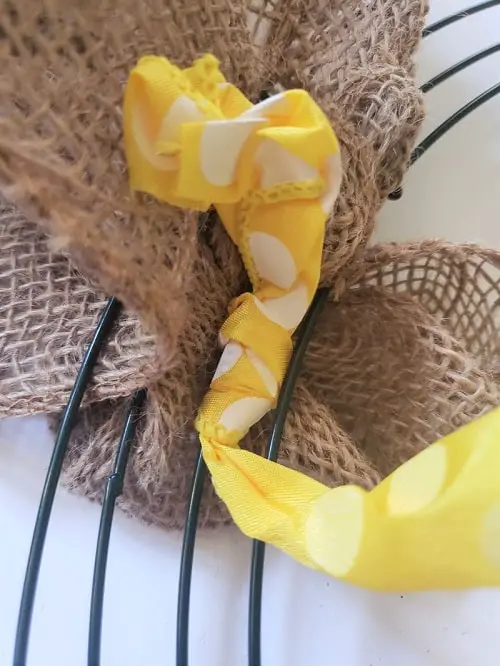
Form a loop like you did with the burlap ribbon by tucking a portion of the accent ribbon up and through one of the wreath form sections.
Leave just one loop or add another one by twisting the ribbon underneath the wreath form and bunching a portion of ribbon through a different wreath form section, as shown above.
From there, it’s just rinse and repeat! Add some more burlap loops in the same way, twisting underneath and then and bunching to form a loop through a different wreath form section than the last, until you’re ready to add your second accent ribbon.
5. Attach the second accent ribbon
As you may have guessed, you’ll attach your second accent ribbon the same way. Up and over a wire, flip the wreath form over, and knot it in the back attached to one of the wires.
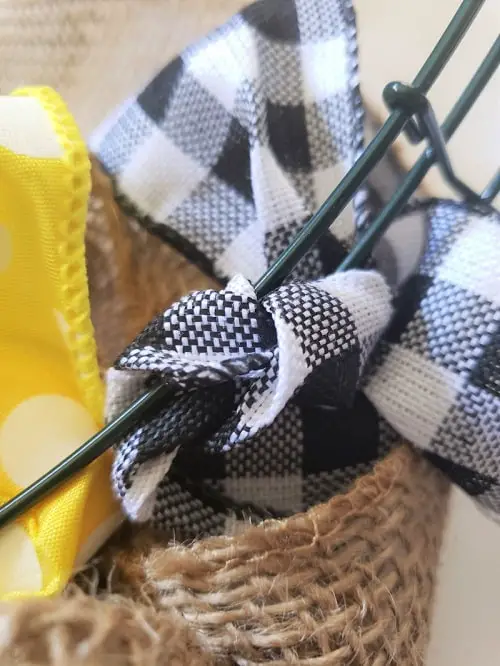
Now, make a loop with the accent ribbon by bunching part of the ribbon up through a wreath form section. Add a few more burlap loops nearby to hold it in place.
6. Keep adjusting and making loops
The most challenging part now is just keeping track of your ribbons and making sure they don’t get tangled up as you move along. You’ll likely need to move them out of the way and cross them over each other here and there as you make loops.
Fill out the wreath with your burlap and accent ribbons in whatever way you’d like. You can try doing 2-3 burlap loops for every 1 accent loop.
Also, be sure to look at your past accent loops to figure out where you want to place your next ones. For example, if you put the last one through the innermost section of the wreath form, put the next one on through the outermost section to get the more randomized look.
Then, go through your wreath and fluff up any ribbons you need to get the finished look you want.
Our craft experts left a slight gap on the bottom of their wreath to add my yellow bow too. But if you’d like to skip the bow, keep filling it up with ribbon. When you’ve finished, use your craft scissors to cut the extra ribbon lengths, leaving a few inches to tie a knot. Then, tie off all the ribbon ends with knots on the wreath form, just like you did to get them started.
7. Add accents
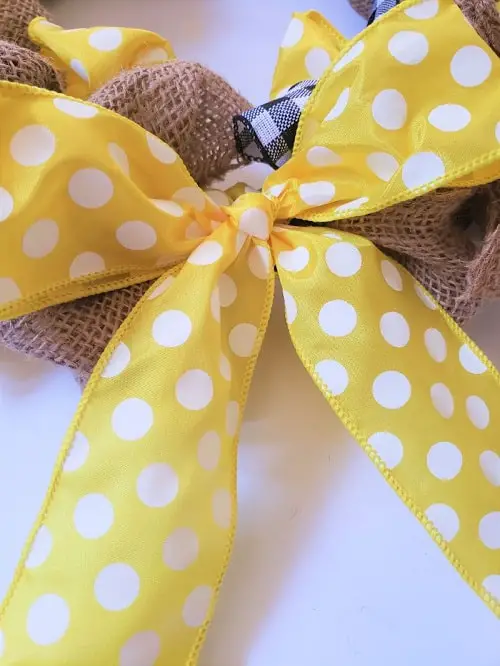
Preheat your hot glue gun. While you wait for it to warm up, tie a bow onto the bottom of the wreath form between your loops.
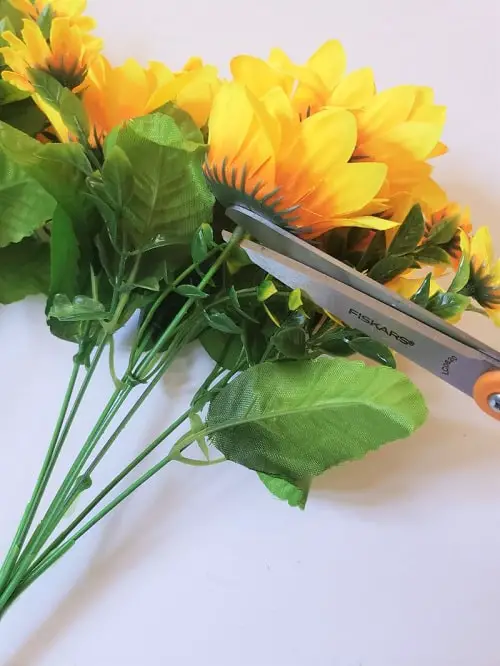
Use your craft scissors to snip a few flower buds and leaves from your artificial bouquet.
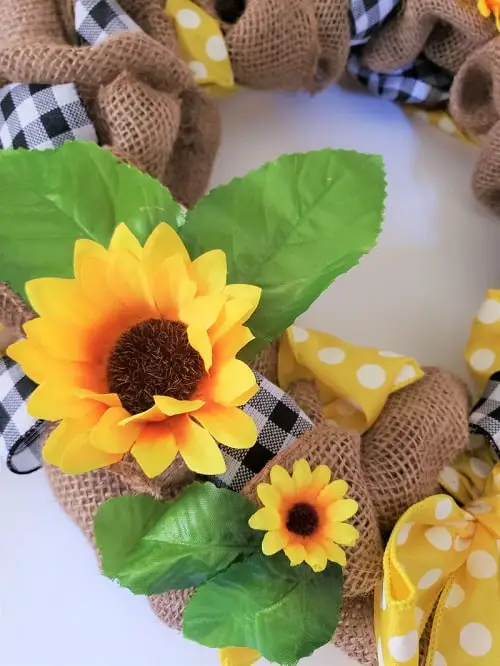
Then, use the hot glue gun to glue the leaves and flowers where you’d like them. Our craft expert did more of a sporadic look, but go with whatever you think looks best.
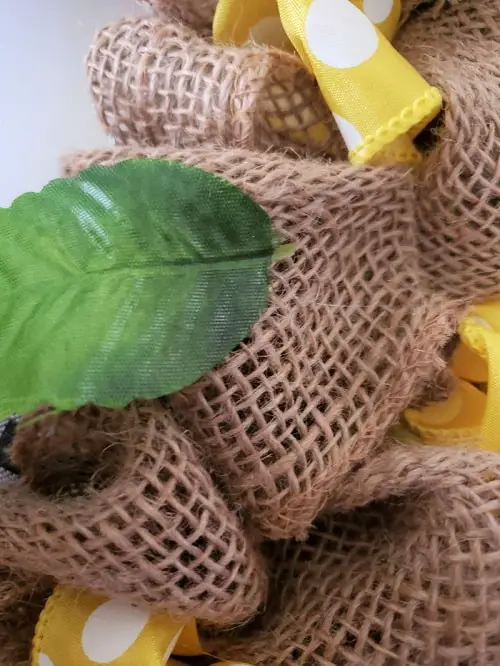
Start by gluing the leaves in place directly to a piece of ribbon. Then, add glue to the underside of the flower and place it on top of the leaves.
8. Tie a bow for hanging (optional)
If you’re going to use a wreath hanger or hook to hang your wreath, skip this step.
To make the hanging bow, take about 18 inches of an accent ribbon and tuck one end through the outer section of the wreath form at the top. Then, tie a bow at the top of it. You now have a cute matching hanger to hang from a nail, screw, or hook.

DIY Ribbon Wreath Tips
Crafting a ribbon wreath is easy once you get a couple of them under your belt. But if you’re just beginning, these tips might help you:
- Start with just one ribbon spool if you’re a complete beginner. The hardest part of making a ribbon wreath like the one above is keeping the ribbons from getting tangled! So, you might just make a wreath with just burlap ribbon or another ribbon of your choice until you get more practice. Once you get the hang of it, you might feel better about adding another ribbon spool or two in.
- Your wreath loops don’t need to look perfect as you go! Once you complete a section of the wreath, take a couple of minutes to fluff the loops how you’d like them to look. These wreaths aren’t meant to look perfect, so don’t worry if you have a few loops that look bigger or smaller than others.
- Remember to push your ribbon loops together as you go along. This helps create the full, fluffy look that you get at the end without having any of the wire wreath frame showing through.
Ready to try some other crafts? Start with DIY pebble art (a super easy and fun project to make with the kids!) and follow along with Creative Family Moments.